Showing posts with label Recipe. Show all posts

Recipe: My Go-To '5 A Day' Green Smoothie


Like many of us who got wrapped up in the 'clean-eating' craze that's happened over the last few years, I've done my fair share of experimenting with green smoothies! I've thankfully come out the other side of my food issues, and as a general rule I don't think green juices and smoothies are all they're cracked up to be. They're often more fruit than vegetables and if they're not can be a bit prone to tasting like a mouthful of hedge! Given that I love non-blended spinach, kale and broccoli it makes sense to me to just eat them!

However, I do make this one quite regularly, on days when I know I might not be getting my full quota of fruit and veg for the day from meals, or if I don't feel particularly hungry at lunch time. It's got more veg than fruit and contains your entire 5 portions in one go!

You will need a really good blender as well as:

1 apple
1 kiwi fruit
1 lime
A really big handful of spinach
5cm piece of cucumber
3 big pieces of broccoli

Optional:

1 date (sometimes I add this, sometimes not depending on how sweet the fruit is and what I fancy)
1 tablespoon of greens powder
1 tablespoon of protein powder (I sometimes add pea or hemp protein if I'm having this at lunchtime)

Squeeze everything into the blender, cover the veg with cold water and whizz it up! I like to put it in the freezer for a bit before drinking so it's lovely and cold but you could also add ice to the blender in place of some of the water. It's also amazing with coconut water - but we're not all made of money now are we...

Now, for your enjoyment, some flat lay out-takes featuring my sister, who thinks me and my piece of white card are ridiculous, so stole my apple then wished she hadn't because juice went all over her face...


Introducing 'Food Moments' - A Beid Bil Tamriya Recipe from Ellie Ward


I recently got an interesting message from an online friend I met through instagram. She is a fellow Eleanor, although she prefers Ellie, and I believe we 'met' (albeit virtually) after discussing natural dye techniques. We've stayed in touch, and a few weeks ago she suggested a recipe I might like to feature on The Salted Tail and it got me thinking. 

Reading the post submission Ellie sent made me realise how instrumental food can be in shaping our lives. I certainly have several memories that have food at their centre, and it is one of the most important factors in my life, from deciding where we go on holiday to the time spent perusing recipe books before I go to bed. 

I have also had some issues with food in the last few years, and it's only recently that I've let myself re-discover my love for it. I've been reading my books like they're novels, perusing the market stalls for local ingredients, devouring food based podcasts and binge-watching baking videos. 

It's like a really big bit of me has woken up (and gone in search of breakfast!)

So, to celebrate my reawakening, I've decided to start a new series I'm calling Food Moments. These will be guest posts, (plus a few moments of my own) sharing life's important memories and moments where food has been at the heart. Prepare for lots of reminiscing and recipes! 

For now, it's over to Ellie for the first in the series. She shares why a favourite cafe in Peckham became an important part of her family life, and a brunch recipe she devised after tasting a particular dish and needing to re-create it at home.

Enjoy! 


"I lived in Peckham for a decade before making the predictable move to outside the M25 when our son was born. We saw the area of London we lived in change over time. From a place with low rents that encouraged many to start innovative restaurants, artisan delicatessens, gallery spaces and yoga studios to a place known for exactly that. In poured money and gentrification took a firm grasp. Rents crept up and many of the original businesses were forced to re-locate. We decided at this point it was time to cash in and sell. 

Despite it’s relatively rapid ascent (or descent as some may argue) I miss that beautiful part of London everyday. I miss it’s vibrancy, its inclusion and its warm openness to all. One place sums up Peckham for me better than anywhere - Persepolis. Persepolis is a corner shop and cafe that has been in the same spot for 16 years. It’s run by an incredible lady called Sally Butcher and her Iranian husband Jamshid. It houses an amazing array of exotic goods: herbs, spices, oils and teas as well as other impossible-to-find-elsewhere ingredients.  

Pre-child, we would often go on a weekend morning for a slow brunch, tasting several unusual yet totally delicious dishes.  Once our son Ludo was born, we would call in after swimming for a refreshing pomegranate juice and a takeways box of Turkish delight from the counter. In fact, our son had his first taste of solid food Persepolis - flat bread and hummus - true story! 

The first plate I ever tried was an Iraqi breakfast dish called beid bil tamriya which is basically eggs, dates and cardamom. It’s so ridiculously simple yet so delicious. I ordered it because it sounded so odd I just had to try it! In the UK we tend to consider eggs outside of baking as a savoury ingredient - quiche, omelette, or hard boiled with a pinch of salt and soldiers. This dish however is a sweet sensation! 

For two people you’ll need:


- Butter or coconut oil for frying (I personally prefer coconut oil for it’s plant based fats and creamy taste) 
- 2 medjool dates (or three regular ones)
- 4-5 eggs (depending on your hunger level!)
- A teaspoon of cardamon powder (you can buy this pre-ground or break open some pods and grind the seeds - you'll need about 10 pods)
- Some great sourdough bread


First, de-stone and roughly chop the dates. Heat the butter or coconut oil over a medium heat and add the chopped dates. Fry them until they’re softened, mashing a bit with a wooden spoon as you go. Take care not to let them burn. 

Beat your chosen number of eggs and add to the pan with the dates. Stir constantly to scramble your eggs to your preferred consistency then remove from the heat and stir in the cardamom powder. 

Serve with sourdough, black coffee and a Sunday supplement." 


***
Ellie is a 36 year old ex-fashion buyer, now a mother and a maker. She lives in the modernist village of New Ash Green, Kent with her husband and son. She has a jewellery brand called Unknown Legend. You can find Ellie and her beautiful jewellery on Instagram or have a look at her etsy shop here.

This beid bil tamriya recipe is wonderfully delicious! I've made it several times already and I've also found that combination of dates and cardamom makes an amazing addition to porridge! I will definitely be visiting Persepolis next time we're in London. Ellie also recommended their recipe books which do look wonderful! Persia in Peckham for example is describes as 'A slightly daft English woman guide to Persian cuisine"


Hopefully you enjoyed the first Food Moment. I can't wait to share more stories with you, and if you have a favourite food moment you'd like to share please to get in touch - everything you need is under 'Contact' above! 

Recipe: The Easiest Ever Low Sugar Ketchup


For various health reasons, neither D nor I have an awful lot of sugar in our diets. We're definitely not super strict about it, but if we're going to eat something sugary, it's got to be really worth it! Something that we both miss, but have deemed to be unworthy, is ketchup!

D is a traditional ketchup eater, meaning that in his mind it's for dipping your chips in and squeezing on a burger. My use of tomato based condiments is a bit different. It would never occur to me to put ketchup on my chips (because mayonnaise is surely the only choice?) but there are three things that are just wrong without it: Scrambled eggs, cheese on toast, and shepherds pie! Strange choices maybe, but I honestly feel like a shepherds pie is wasted without a large dollop of it.

So, I set about making a ketchup that would satisfy the need for a tomato based sauce and was also super quick to make, low in sugar (which traditional ketchup is most definitely not) and cheap.

This could definitely be made with fresh tomatoes, but unless you have a huge glut of them in the summer I feel like it would be a bit of a waste to make them into ketchup when they're so amazing fresh. Plus, this sauce gets used up really quickly in our house so there would be no chance of there being any left by the winter if we treated it as proper preserve, so by using passata rather than fresh tomatoes it can be made all year round.

These quantities make a ketchup we like, but feel free to alter the amounts to suit your own taste. The smoked paprika gives it a slightly barbecued flavour, but you could swap it for normal paprika if you like. You'll need:


500ml of passata
4 teaspoons of maple syrup
4 teaspoons of apple cider vinegar
2 teaspoons of worcestershire
2 teaspoons of smoked paprika
2 teaspoons of salt

Put all the ingredients into a small saucepan and simmer (very gently or it will spit all over the kitchen!) for about 15-20 minutes until it's reduced and nice and thick. Give it a taste and adjust the seasoning if you think it needs it, but remember the taste will be slightly more subtle when it's cold.


The recipe makes around 300ml depending on how much you reduce it down by. If you buy a glass bottle of passata you can re-use the bottle to store your ketchup, or it fits quite nicely into two small jars. I had plans to put this batch into the screw top glass bottle in the pictures, but I managed to drop it in the sink while I was washing it up and smash it so it ended up two recycles honey jars instead!

As we use this really quickly, we don't tend to worry about sterilising the jars properly, just pour the ketchup in while it's hot, seal them up then turn them upside down so the hot ketchup covers the whole inside surface. This should be enough to create a vacuum that will keep them fresh for  a little while. You'll notice the safety button on the lid pop in if you're using a jar. If you wanted it to last longer, wash the jars/bottles and their lids in hot soapy water, rinse with hot water then without touching the inside of the jars or lids, place them in a hot oven to dry. Take them out when you're just about ready to bottle the ketchup and let them cool just a little. Pour in the ketchup, seal up and turn them upside down for a few moments.


And there we have it - super simple, super quick and supremely tasty ketchup ready to slather all over your shepherds pie...or dip your chips in if you really insist!

Recipe: Frozen Yoghurt 'Fab' Lollies


It's been wonderful to see the sun again over the last few weeks hasn't it. Weather like this definitely calls for evening walks, lunch outdoors, fish and chips on the sand and of course, the odd ice cream. 

I'm not going to pretend I don't enjoy chip-shop-chips and seafront ice cream, but mostly we like to try and have healthier alternatives when we're at home and frozen yogurt lollies have become a bit of a dessert staple for us recently. 

Recipe: Strawberry, Halloumi and Balsamic Salad


This strawberry halloumi and balsamic salad is SO simple it probably shouldn't even be called a recipe but it was so delicious I really wanted to share! My love of balsamic knows no bounds and I honestly think it makes everything better! When paired with fruit it seems to make it taste even sweeter and it makes the perfect dressing if you're going to put fruit in a salad because it sort of convinces the fruit it's not a pudding and ties everything together! 

This is very much made to my taste, so if you fancy a bit more pepper, or a bit less balsamic - go ahead! For one serving you will need:

- A big handful of mixed peppery salad leaves (rocket and watercress work really well to balance the sweetness from the strawberries and balsamic)
- 5 or 6 strawberries (organic if possible - strawberries absorb pesticides really easily and you don't want those in your lunch!) 
- 5 (ish) slices of halloumi (when you've sliced it immediately put it in the fridge or you'll eat the lot while you wait for it to cook - such is the nature of this addictive salty treat!)
- Extra virgin olive oil
- A good quality balsamic vinegar (a cheap one just won't cut it, it needs to be lovely and thick so definitely hunt out an aged one if you can!) 
- Sea salt and freshly ground black pepper


To be honest you could probably figure this out from the picture, but just incase:

- First heat up a little oil in a frying pan and fry your slices of halloumi until they're golden and just starting to crisp up. They'll take around 4-5 minutes on each side.
- Meanwhile, slice your strawberries in half, and pile them onto a plate along with a big handful of salad  leaves
- Check your halloumi and turn it over! 
- For your dressing add equal amounts of balsamic vinegar and olive oil to a small jar. Add a couple of good grinds of black pepper, a tiny pinch of sea salt (remember the halloumi is pretty salty!) and shake it up! You can just add the oil, vinegar and seasoning to the salad separately, but I like the combine them before hand.
- Add your now lovely crispy golden halloumi to the plate, pop a little more black pepper on the strawberries and maybe a couple of little drips of balsamic - and tuck in!!!

This isn't really a salad in the traditional sense given that there are only three main ingredients but sometimes something super simple just fits the bill doesn't it! I think if you wanted to make this a little more filling, some parma ham and a slice of toasted sourdough would be lovely, and you could try swapping out the strawberries for perhaps a super ripe peach or some figs when they're in season! 

Enjoy! 
SaveSaveSave

Pumpkin DIYs: Spiced Candles, Chocolate Cookies and Vanilla Cacao Pumpkin Seeds

Pumpkins and squash on the hearth

Earlier this week, my sister and I walked the mile or so to the farm shop down the road from us to pick some fruit and choose some pumpkins! We had a lovely hour or so there, taking photos and marvelling at the completely natural looking, almost neon coloured berries and leaves. 

We found it really difficult to choose, so ended up with armfuls! After picking a bag of apples and pears each, plus a jar of honey (can't get more local than a mile away!) we laughed on the way home about how we'd end up looking like Mr Tickle after carrying so much weight! 


I really wanted to make the most of all this wonderful produce, and of course they will be making their way into the usual soups and curries, but I had a few other things in mind too...


Pumpkin Spice Candles

Every year I'm fascinated by these mini gourds, and I picked out a couple to have a play with (and ticked an item off my Autumn Bucket List while I was at it too!)

mini pumpkins

small green pumpkin

miniature pumpkin

mini pumpkins

mini pumpkins on grey

Turning these little guys into candles was really easy! The night before you want to make them, warm around half a cup of rapeseed (or other unscented oil) in a pan, and add your favourite autumn spices. I chose cinnamon, nutmeg and a little allspice - approximately three teaspoons all together. I also added a little vanilla, and the zest of a whole orange. Once warm, leave the oil in a container overnight to infuse. I used half a cup for three small candles, so up the amount depending on the size and number of candles you're making! 

how to make pumpkin candles with infused oil

Next, hollow out your mini pumpkins! I decided to use the orange ones and save the green one to cook later (I'm sure these have real names - but for now we'll go with orange and green!) 

I sliced the whole top off the first one, and for the second I used a cookie cutter to punch a hole in the top and a teaspoon to remove the seeds and flesh. 

how to make pumpkin candles

Next melt your wax! As I was only making three candles, rather than buying a large quantity of wax I melted some good quality soy candles - four dinner candles was almost exactly the right amount for my three candles. Place the wax into a glass or metal just or bowl, then place this over a pan of boiling water and keep a close eye on it while it melts. Whatever you do don't try and melt your wax directly on the heat - use a double boiler to keep things safe! 


wax melting in double boiler

While your wax melts you can get your wicks ready! My candle wicks were very kindly given to me by Rachel of Graceful Wildling who read my post about wanting to make candles and donated some of her unwanted supplies to me! I'm really very grateful, and I'm loving the real life connections the often lonely world of the internet helps us to make (look out for a little thank you in the post soon Rachel!) 

You would usually stick the metal base to the bottom of your candle container, but as it wouldn't stick to the slightly damp pumpkin interior I simply pushed one edge of the metal into the pumpkin to hold it in place. To stop the wicks falling over and ending up off centre, prop them up with some skewers or similar.  


how to make pumpkin spice latte candles

Once youw wax it melted, pour in your infused oil and give it a good stir. Working quite quickly as the oil will have brought the temperature of the wax down, fill each of your pumpkins with wax. 

how to make pumpkin spice candles

When the wax is very nearly set, you can sprinkle the top with some extra spices. I also added a few coffee beans as a nod to the pumpkin spice latte grand (which I still can't stand I'm afraid!)

pumpkin spice latte candle

how to make pumpkin spice latte candles

how to make pumpkin spice latte candles

Trim your wick, leave to set completely, then light and enjoy! I also made one in a tiny glass jar and added some of the orange zest from the infused oil. 

pumpkin spice candles tutorial

Geometric Patterned Lantern

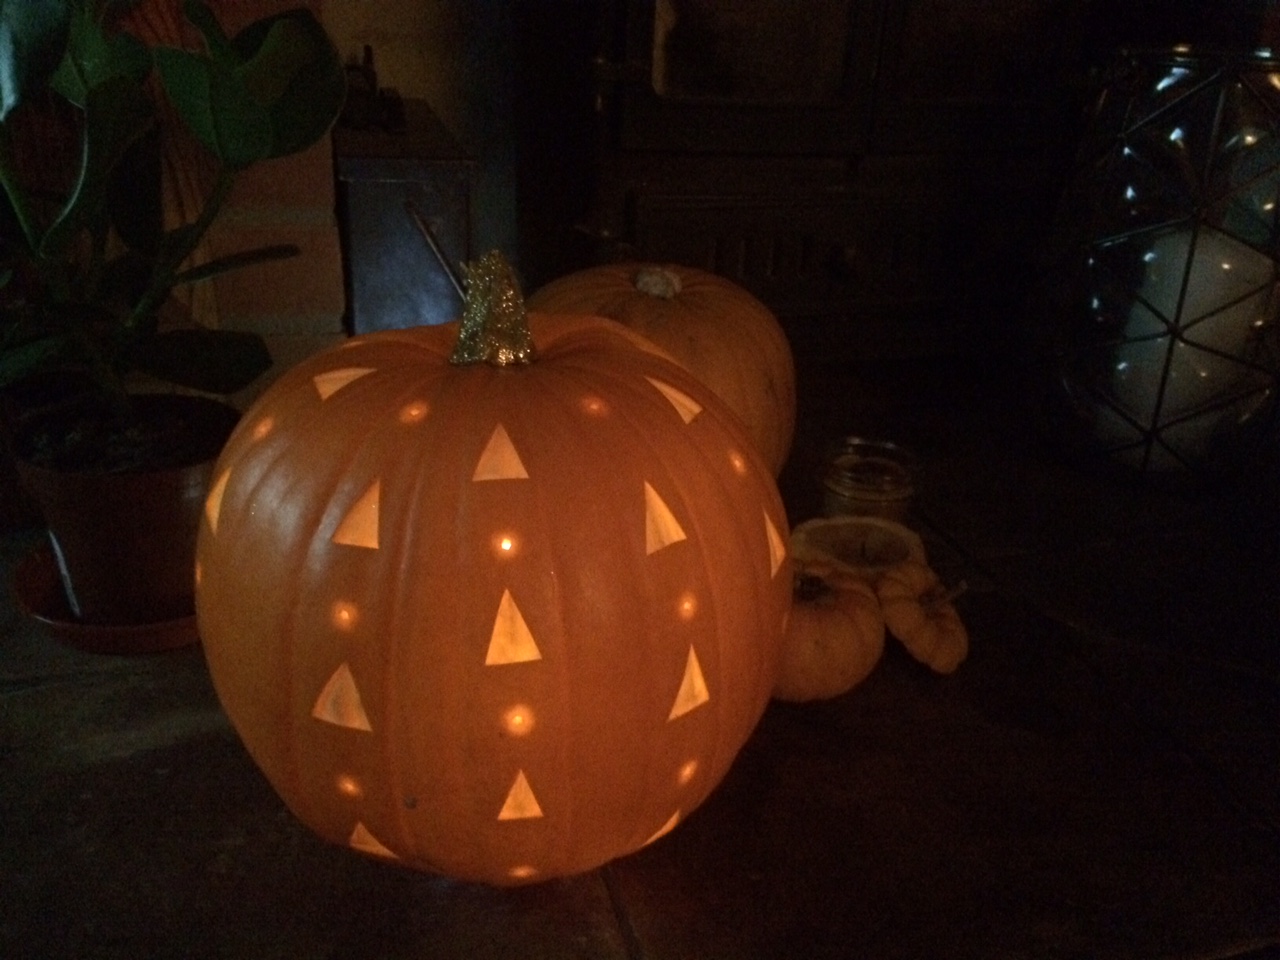
Of course, one of the pumpkins was destined for carving, but I didn't fancy carving the usual scary face! I used a craft knife to gently score each triangle into the surface of the pumpkin, then removed only the top layer of skin, exposing the flesh underneath. To allow a little more light out I used a small drill bit to puncture holes between the triangles. A little PVA glue and glitter on the the stem, and my pumpkin is complete!  


pumpkin with glitter stem and pumpkin spice latte candles

glitter stem pumpkin

glitter geometric carved pumpkin

I'm so pleased with it! The opposite of scary and much more about celebrating the beauty of the season which is what our halloween is all about (I wrote more about this last year) 

Chocolate Squash Cookies

Now, I'm really not a fan of pumpkin spice lattes - I just don't think a vegetable belongs in a coffee! However, I am a fan of vegetables in cakes and decided to have a go at some butternut squash cookies!

I'm quite pleased with them - the texture is somewhere between cookie and brownie, and I think with a few more oats they could be pleasingly flapjack-y!

You will need:

400g peeled and diced squash or pumpkin
1/2 cup of plain flour (I used wholemeal spelt)
1/2 cup of oats 
1/2 teaspoon baking powder
1/2 cup of peanut butter (I used crunchy!)
1/2 - 3/4 cup of sugar or sweetener of choice (I used coconut sugar, and kept it to 1/2 a cup - the squash gives quite a lot of sweetness)
2 tablespoons coconut oil
100g really dark chocolate 
A pinch of sea salt


cubed butternut squash for pumpkin cookies

Method:

1. Boil or steam your squash until cooked through, then drain and leave to cool slightly

2. While your squash is cooking, mix the flour, oats, and baking powder in a large bowl

3. Place the cooled but still warm squash into a food processor (if you don't have one I imagine this would work fine with a bowl and a potato masher!) and whizz until smooth

4. To the pureed squash, add the peanut butter, sugar and coconut oil. Whizz up again. The warmth from the squash should be enough to liquify the coconut oil and soften the peanut butter. 

5. Pour the butternut mixture into the flour and oats, and mix well. Depending on the type pf flour you used, and how much water your squash absorbed you may need to add some extra flour. It should be slightly looser than a dough, but not so loose that it won't hold its shape. At this point add the chopped chocolate and mix well. The slight warmth should just melt the chocolate so it ripples through the mixture. 

6. You can either bake these now, or freeze to make later. To bake straight away, line a tray and dollop tablespoonfuls (I love that word!) of mixture onto the tray, flattening each out slightly into a rough cookie shape. Top each with a few extra oats, as sprinkle of sugar and a few flakes of sea salt. Bake for 12-15 minutes at 180 degrees - they will be a little soft when you first pull them out of the oven, but will firm up slightly when cooled (although they should still be soft and brownie like!)

7. Alternatively, place the mixture onto some greaseproof paper, roll into a sausage and freeze. When you want to bake you can slice off as many pieces as you need, then bake for approximately 18 minutes, pulling them out after 3-4 to add the extra toppings! 

pumpkin cookies

how to make pumpkin chocolate chip cookies

recipe for pumpkin cookies

These didn't last long at all! Thankfully I still have half the mixture in the freezer for later! 

Vanilla Cacao Pumpkin Seeds

I didn't want all those pumpkin seeds to go to waste, so I threw together this little concoction and it was AMAZING! It's so simple its not even a recipe, and I can't be specific with measurements, so just experiment with what you fancy! 

Wash and dry the seeds, put them in a bowl with a drizzle of rapeseed oil, a sprinkle of coconut sugar, a teaspoon or so of cacao  (or cocoa) powder and a generous pinch of salt. Roast in a hot oven until they're crispy and beginning to pop! The coconut sugar will caramelise and the sweet and salty combination is the best! 

I ate an entire pumpkins worth of seeds in about five minutes! 


recipe for vanilla cacao pumpkin seeds

There we have it! A plethora of ideas for using those pumpkins you just cant resist buying! I think I've caught the candle making bug and definitely want to try some with essential oils, and I'm dying to experiment with infusing the oil with herbal tea...watch this space! 

Happy Halloween!! 
Recipe - Roasted Tomato and Garlic Soup with Basil Oil


Thanks to my Grandad and his amazing gardening skills, we've been growing three different types of tomato this year. He starts them off from seed, and when the plants are strong enough passes them on to pretty much anyone who will take them (we've suggested he just doesn't grow as many - but every year there appears to be more!)

These three plants alone are more than enough for the two of us, and every morning there are a few more perfectly red ripened beauties waiting for us! Last weekend, my Grandparents popped over with two huge butternut squash (which we've been steadily ploughing through all week) some cucumbers and a huge bag of tomatoes! Then on Wednesday, I met a friend for lunch and her husband gave us a bag full to bursting with runner bean, and even more tomatoes.

Now, I'm not complaining in the slightest, but I was slightly fearful that these lovingly grown vegetables might end up going to waste with only two of us to eat them all, so I set about making some soup to make sure they all got used up! I was never a fan of tomato soup until I started making my own, and now it's a firm favourite! I especially like it with some baked sweet potato wedges and a swirl of cream if I'm feeling particularly indulgent.

This recipe is about the simplest thing ever, yet when you serve it up with a drizzle of basil oil and some drops of extra virgin, it looks pleasing professional!

I hope you enjoy - do let me know if you make it!


Recipe - 'Better Than A Bounty' Chocolate and Coconut Porridge


If you follow me on instagram, you will have noticed me enjoying this treat of a breakfast from a huge enamel mug yesterday! Lots of you were intrigued by the recipe, so as promised I'm sharing it today!