Showing posts with label Making. Show all posts

Christmas Gift Guide Volume Two : Make it Yourself

I am definitely guilty of planning to make too many Christmas presents then ending up in an absolute flap three days before because I haven't finished them. This year's plan is to get everything bought by December the 1st, then everything made in the first two weeks of December so when we get the tree up and start decorating the house everything is done! 

On that note, today I'm sharing some ideas for gifts you can make yourself. Some are super simple and others are a little more time consuming, but hopefully it's early enough and if you do want to make some presents this year you'll have plenty of time to get everything finished! 

I'll be adding more ideas to all the gift guides throughout November and December so keep checking back if you're enjoying them. I've added a tab to the menu bar above where you'll be able to find them all! 


My parents seem to get given two or three plants for Christmas every year, poinsettias or hyacinths that are picked up in the supermarket, last five minutes, and (in the case of hyacinths) smell bloomin' awful!

You can buy much more stylish (and longer lasting) cacti and succulents for a few pounds, and repotted into a homemade planter they can become something really special. I love this woven planter tutorial from Teri at The Lovely Drawer, and she has several other planter tutorials on her blog too, like this hanging one, and this painted rope one.

Baked Goods in Tins

It's always lovely to get something homemade, and you cant go far wrong with a tin of homemade goodies. The set of three in the image above are from Ikea are only £6, and you can usually find similarly priced ones in supermarkets, or Tiger were pretty good for tins last year too. However if you put a little more money and thought behind it the container can also double up as an extra present.

These personalised jars are a little pricey, but I think they're beautiful. A quick search on eBay will uncover an array of vintage Quality Street tins for a bit of festive nostalgia, or this set of Orla Keily tins could prove quite good value as they can be split to give as several gifts.


If you have children to buy for but like to steer clear of things that will become additions to the plastic mountain, making a gift is perfect. There's nothing better than seeing someone really loving and using something you've made for them and handmade things are sure to become firm favourites. I made a farmyard version of this little backpack last year and was SO pleased to see it still being used at a recent family gathering. If you can sew straight lines, you can definitely make this and I've split the tutorial into three with really clear visual instructions - I'd love to see what you come up with if you decide to make one yourself.  


This recipe is a bit of a Christmas tradition in our house. We've been making it since we were at uni and it never fails to go down well, it's not too spicy, but not sickeningly sweet like some chilli sauces and you can vary the heat too depending on how hot your chillies are. It's really really simple to make and looks really festive tied up with twine and a pretty tag. Package it up with some nice crackers and strong pecorino for extra brownie points!  


It's all too easy to fall back on bath and body gift sets at Christmas, and while it's always nice to get some nice bits you wouldn't necessarily buy for yourself, you can quickly end up inundated with too many body lotions. This lavender sugar scrub is a bit different, really easy to make and feels luxurious, especially when it's used as part of a foot soak ritual. If you click through to the recipe I've also added a downloadable gift tag with instructions for the ultimate at home pedicure that you can add to the jar. You could make it really special by adding some nice socks and perhaps some lavender tea or chocolate treats for the recipient to enjoy while they're treating themselves to a post-Christmas-pedicure.  
SaveSave

DIY Tutorial: Bunting Cake Topper


It's been approximately a millions years since I've written a tutorial post, and the reason for this is that its been approximately a million years since I've actually made anything. 

This is a super easy one but I think it will also be really useful as it can be really easily adapted for any occasion, plus a nice topper can make a simple cake feel much more celebratory! 

I actually made this for my friend Grace and her daughter Evelyn who's first birthday isn't until the weekend. I therefore don't have any photos of it in situ atop a cake, but hopefully you'll get the idea. Also (apparently I'm trying to squeeze in as many apologies as I can in the first few paragraphs of the post) the light while I was taking these photos kept changing, and then my camera battery ran out so just pretend the photos are amazing okay? 


So, you will need:

- Paper to use as a template
- A plain coloured paper (I used the pearlised pink)
- Patterned paper 
- Twine
- Straws to tie your finished bunting to
- Scissors, a ruler, glue and a pencil! 
- Letter stickers. Of course you could cut out letters from paper and stick them on, but the stickers are really easy and I love the Meri-Meri All Wrapped Up glitter stickers. I bought about 5 packets in TKMaxx a while back and I use them a lot, so much so that if I ever see them I'll buy another packet because I'm a bit scared of running out! 

First things first, you'll need to make yourself a template in the shape shown. Mine was 4.5cm wide by 14cm long, and I just eyeballed it based on the size of the stickers. Cut out the required number of flags from your patterned paper, or whichever paper you're going to have as the base of your flag. I did three! 

Once you've done that, cut about 4-5mm off your template all the way around to make a template for the smaller part of each flag. You can use a ruler and measure it, or just guess with the scissors.

(See what I mean about the light changing? Nightmare.) 


I feel like the rest of this is very self explanatory! Glue the layers together, then fold each flag in half. You might beed to have a little trim up if the front and back don't quite match up.  

Pop your letter stickers on to each flag. I chose to put a sticker on the back of each flag too so that the topper works from either side. If you want to do the backs too, make sure you get them the right way round so your chosen word doesn't end up backwards!    


Stick each flag onto a length of twine, and you're done! 

When it comes to popping it onto your cake, tie each end of the twine onto the top of each straw. If your cake is really soft you can probably just push the straws into the cake, but it may be easier to cut some barbecue skewers down to just shorter than the length of the straws, then pop those into the cake at an angle and slide the straws over the top.   


Making a Copper Pipe Plant Stand


I've amassed quite the collection of house plants over the year we've been living here, but as we're only just starting to do any major decorating, they haven't really found proper homes yet. Many of them are still sitting in their plastic terracotta pots awaiting some attention and this one in particular didn't seem to be doing so well, it's bottom leaves keep dropping and it's pot was on the small side so I think it had become a bit pot bound (which I know some succulent type plants like, but this just seemed far too small) 

So I set about looking for something larger for it to live in but I couldn't find anything I loved. I also felt I didn't want something that meant it would have to stand on a window sill as, for one thing, our window sills are pretty full of plants as it is, and for another, we have a cat who's favourite pastime is pushing things off tables and shelves and watching them hit the floor! 

After a quick Pinterest search for 'diy plant stand' I came across this copper pipe plant stand tutorial from Deborah at Pure Sweet Joy that I loved the look of! It was super easy to put together and it ended up costing about £20 including the pot. Apart from slicing my little finger with the pipe cutter I really enjoyed the process - like a big copper jigsaw. You can find the full tutorial here, but I wanted to share my process as I made a couple of small changes, and made an irritating mistake along the way too... 


I bought all the copper bits and bobs from Homebase, along with a 2 meter length of copper pipe, and used 2 part epoxy resin to attach everything together. Definitely don't mix too much of this at once as it cures really quickly and it smells nasty so you'll want all the windows open! 

My pot is slightly smaller in diameter than the one Deborah used in her tutorial, so I changed the measurements for the base part of the stand to make it smaller too. This meant that the T-shaped fittings ending up sitting directly next to one another with a small length of pipe glued inside. This is therefore the smallest stand you could make with these fittings, but it would be really simple to increase the measurements to accommodate a larger pot. 


Here comes the mistake: When I glued the second set of t-shaped fittings onto the four corners of the base, I got a bit carried away with making sure they were sitting level and didn't pay attention to where the glue was running. It therefore set inside the fittings making it impossible to push in the legs. So, I spent a good hour filing it down which made a lot of dust and really wouldn't have been necessary if I'd been a bit more careful. 


To decide how long to make the top part of the legs, I sat the pot on the base and cut the pipe so there would be just enough room to slide the pot in to the stand. Remember if you do it like this to take the caps into account too.


After that it was just a case of attaching the legs. I wanted a slightly taller plant stand than Deborah made, so I simply cut the copper pipe I had left into 4 equal lengths. When I came to put the caps on, I noticed it wasn't sitting quite level on the floor, so one of my copper caps has a couple of tiny circles of paper inside it to level things out (you know - like when the waitress shoves some napkins under one leg of your table in a restaurant) I also added some small pieces of self adhesive felt so the feet won't scratch our new oak floor. 


This is how our hall way currently looks. When we moved in it had beige walls and very questionable red carpet (and I think the woodwork was white once upon a time - ew!) We're nearly finished, just the door frames to paint grey and the doors to change, plus little bits and bobs like light fittings and curtains to hang. We may leave the doors as they are for the time being and change them all in one go once we've finished upstairs too - it's lovely living in a big house, but decorating does end up being far more expensive and time consuming. Finally though, with little touches like this, it's really starting to feel like our home now! 


Tutorial: Ice Dying


I first saw ice dyed fabric in the window display of the Regent Street Anthropologie and fell in love with the abstract, painterly, watery feel it gives.

As our bedroom (at some point in the future when we get around to finishing it!) will be vaguely nautical and beachy, I jotted the idea down as I thought it would make the most amazing sort if focal point bedding! I  finally got around to giving it a try a few weeks ago.  There are a few tutorials around, but the method and the type of dye varies a lot so I just grabbed some a couple of different colours of Dylon hand dye, a super cheap white cotton bedding set and decided to make it up as I went along!


I'm so pleased with how it came out! I was going for a sort-of-ombre look, with the deeper blue at the foot of the bed, then fading to the paler blue and leaving the top edge of the duvet cover white. The dye spread a lot more than I had imagined so although I got the dark to light fade, the white edge didn't really happen.  

I'm definitely going to get some better quality bedding and make another set and tweak my method slightly, but if you'd like to have a go yourself here's what you'll need:

- Powdered hand dye (I used Dylon in Jeans Blue and Ocean Blue)
- The items you want to dye - check the dye packet to make sure your dye is suitable for that type of fabric, cotton/natural fabrics will always take colour better than synthetics (I did the duvet cover and pillow cases at the same time and it was fine, although the dye suggests this would be too much fabric. I think because the powdered dye comes into direct contact with the fabric the colour will be brighter than if you were to dilute it)
- Table salt (or whichever fixing agent your dye packet suggests!)
- A big bag of ice
- A large tray to catch the melting ice (I used the seed tray I was supposed to take back to my Grandad which is still in the garage - whoops)
- A rack of some sort so you can suspend your fabric over the tray and let the ice drip through. Something like a cooling rack, or one of those wire steps you put in the cupboard to give yourself more space. I used two upside down cutlery trays which worked well except for the fact the they're metal. I would DEFINITELY recommend using something plastic coated because although the wet fabric was only sitting on it over night, mine started to go rusty so I have a couple of little rust marks near the buttons of my duvet set.
- Washing up bowl
- Plastic sheets to cover your bare wood dining table so you don't get a big blue stain right in the middle that means you need to sand and refinish it (can you tell I did not do this and am talking from experience?)


First of all, you need to soak your fabric in whichever fixing solution your dye suggests. I made up a washing up bowl with the water and salt quantities for both sachets of dye (which I think was 2l of water and 500g salt) and soaked the duvet cover and pillow cases for a good 20 minutes. There was a lot of fabric to try and fit in there so I kept coming back to it and turning it over or prodding it down to make sure it all got soaked.


Next wring the fabric out, and tip the salty water away. Position the racks above the tray you'll be using to catch the melting ice, then place your wet fabric on top. I had planned for the top edge of the duvet cover to stay white so I didn't pile this on the rack but let it hang over the edge into the washing up bowl.


The way the fabric is positioned will affect how pattern ends up so you can have a bit of a play with twisting or folding it to create different effects. I didn't realise at the time but I actually managed to leave the duvet cover folded in half down the middle which has meant it's ended up symmetrical which isn't ideal! I tried to make a sort of wavy pattern and put in a couple of big twists.

I then laid the pillow cases on top of the duvet cover, and again let one short edge of each hang over into the washing up bowl hoping this would give a sort of left-to-right fade.


So, onto the dying! First off, pile as much ice as you can manage on top of the fabric, I managed to fit about a bag and a half on top before it started falling off! I got really carried away with taking photos because it just looked so pretty and crystaly! 


Then, open up your packets of dye, and start sprinkling! I used the darker colour at the bottom (or foot end) of the quilt cover and then the lighter colour at the top, blending them a little in the middle. 


It is so much fun!! It was so fascinating watching the powder start to dissolve on the ice and I didn't really know when to stop so I just kept going until it looked like the powder wasn't dissolving anymore. Then I realised there was such a small amount left I just chucked the rest of the dye on and hoped for the best. 

I was really worried at this point because although the Denim Blue looked great (you can see it down towards the bottom left) the ocean blue looked decidedly purple and purple is my least favourite colour so I really didn't want purple bedding! 


Then just leave it until all the ice has melted! I was totally obsessed with it and kept sneaking into the dining room to have a look at how things were progressing! It's so pretty, and it's so much fun watching the colours slowly soak through the white fabric.  


When I went to bed, this is how it was looking. I was rather concerned about the purple at this point but pleased with how it was fading towards the top edge. I'm not really sure why the different pigments in the dye seem to separate, but for some reason it all looked a bit orange!  


So, when the ice has all melted, it's time to rinse! I was too excited and forgot to take any pictures, but by the time I woke up the purple had turned a much more pleasing blue! 

I rinsed all my fabric in the bath which was definitely easier than trying to fit it all in the sink but I did stain the bottom of my bath blue which isn't ideal.

When you've rinsed the fabric as much as you can and the water is running clear (or nearly clear - it will take a quite long while!) pop it all on a quick wash with a normal dose of laundry detergent then hang it out to dry! 


I love it, and I think I might be in love with this method of dying too! It totally reminds me of swirling waves and inky ocean depths and the flashes of white that did get left un-dyed are like the crests of a breaking wave. The faded effect came out much better on the pillow cases than the duvet cover too. I'm definitely going to get a much better quality bedding set and make another set, and I think I might just go with the Jeans Blue colour as I'm not a massive fan of the still somewhat lilac-y Ocean Blue. I really want to try it with linen, but I'm not sure I'm feeling brave enough to dye expensive linen in such an unpredictable way...we shall see! 

So yes - I hope if you try it out you love it too, I'd love to hear how you get on if you do!
SaveSave

Raku Firing Experience: The Good Life Experience


Last September I was invited to spend the weekend in Wales at the Good Life Experience, and it truly changed my life! I wrote a post about it here, but one of the most magical experiences I had over the whole weekend was raku firing, something that had been on my bucket list for years since learning about it at university. In light of The Great Pottery Throwdown being back on TV, I wanted to share my raku experience (prepare yourself for some over the top grinning!) 


The workshop was run by a group of local potters, and there were several hand thrown pots to choose from. I chose to work on a little pot with a foot and some gouged markings. Raku is a somewhat unpredictable method of glazing and firing, so the emphasis was on working instinctively, not overthinking the process and letting the glazes act naturally - just the way I love to work with materials, letting their qualities and characteristics determine the outcome of the end product. 

I began by dipping the pot diagonally into the white glaze, then filled it and poured it back out to coat the inside with glaze. 


Then it was onto dripping the glaze and copper oxides. The pale blue becomes a rich turquoise with hints of copper depending on the firing, and the brown becomes a bright green. I wanted a vaguely painterly finish that followed the gouged marks in the pot, but I struggled with the definitely right-handed ladle and ended up embracing a much more haphazard finish.


Once we were happy with the glazing, the bottoms of the pots were cleaned so any glaze that may have got onto them didn't stick to the kiln and cause the pots to crack. They were them placed into the raku kiln and heated to a completely terrifying 1000 degrees centigrade which took about 20 minutes.  The workshop I took part in happened in the early evening, but they continued well into the night and we went back to watch the firing process happening in the dark which was quite incredible!   


Once heated to the magic 1000 degrees, the pots were very carefully removed and immediately placed into troughs of sawdust which ignite as soon as they come into contact with the scorching pot. More sawdust was thrown on top, and the troughs quickly sealed. It's this process which causes the glazes to crackle and the unglazed parts of the pot to become black thanks to the carbon residue from the burning sawdust. 


When the pots come out, they were quickly plunged into cold water to cool them before we set about cleaning off the carbon left behind on the glazed parts, revealing the finished pot and seeing how coppery the oxides had become! 

I was pleased to see some of the turquoise areas of mine had become a pleasingly bright copper around the edges. I decided to leave a little of the black residue on mine as I quite liked the contrast it gave.  


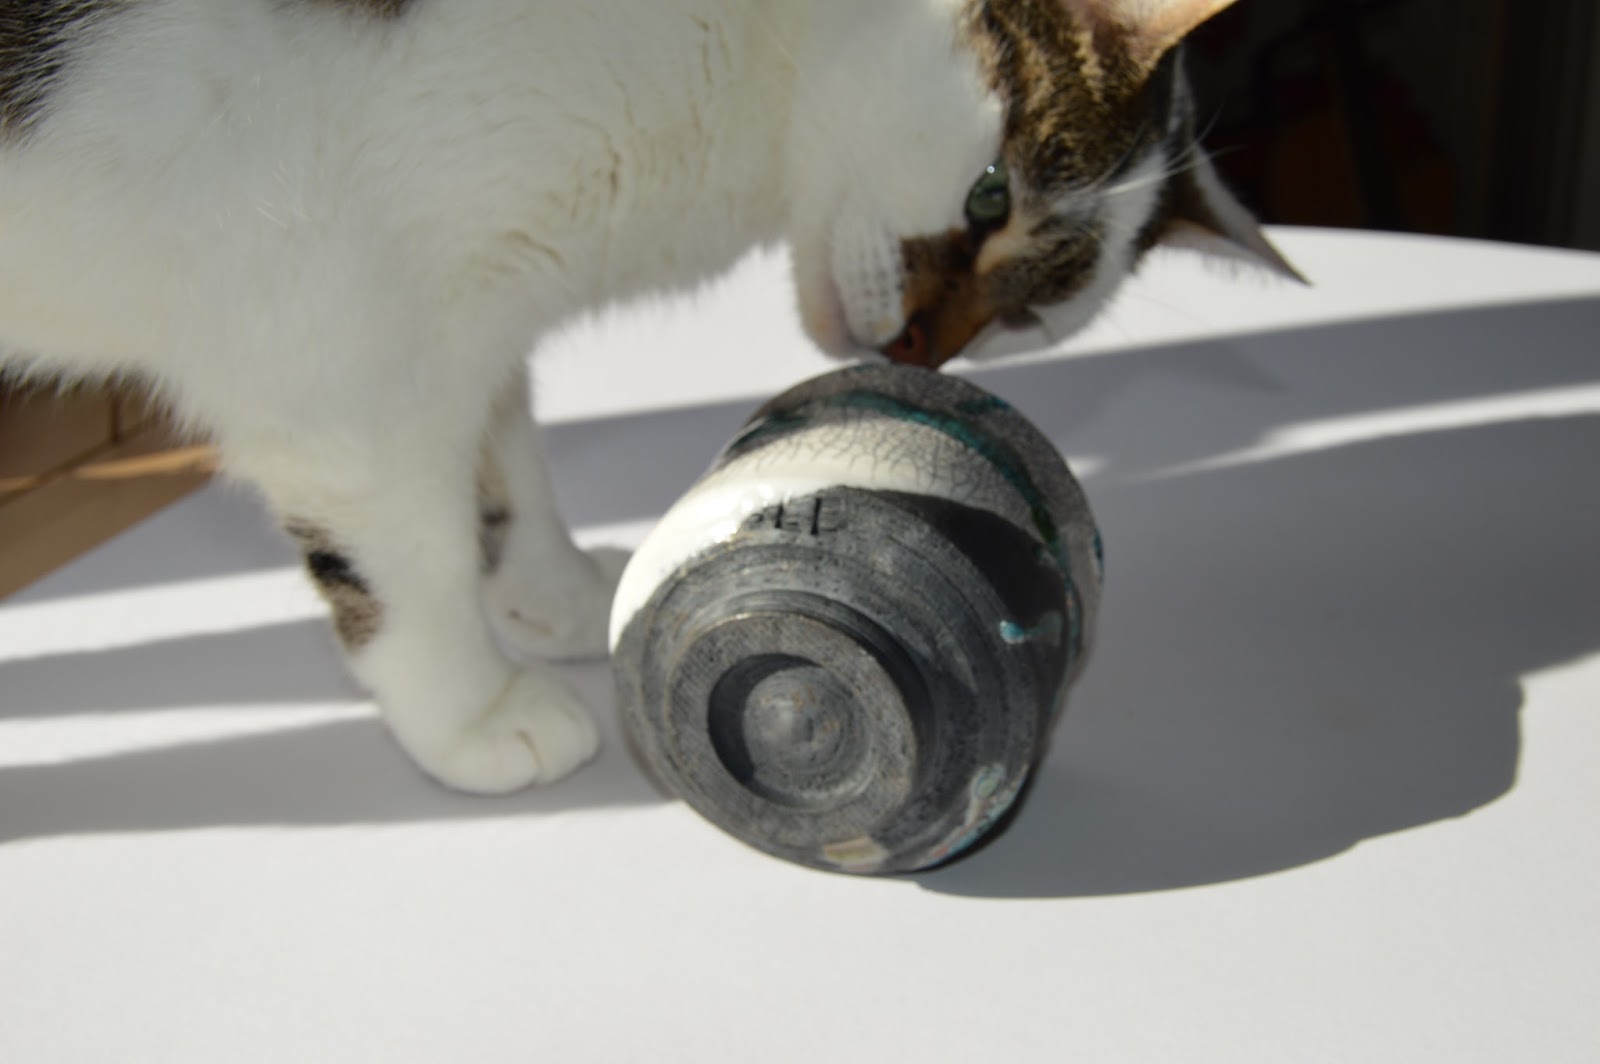
It was the best fun, and I'll treasure this little pot forever! At the moment it's hidden away (out of reach of the cat) which is a bit of a shame, but I'm not really sure what I should use it for. I don't really want to plant something in it as the inside is so pretty, and it's not food safe. Maybe I'll have it out on display somewhere to remind me of that magical day in September! If you'd like to read more about our weekend at the festival you can find it here.